Getting to grips with grips - modifying a recurve grip
This is an old post I wrote elsewhere on the internet before I built this website. I have now moved it here.
It details how to modify a recurve grip, using epoxy putty, into a customised shape for you. There is also a discussion of the different styles of grip and how to select the best one for you.
The first thing I’ve decided to post about is the most recent thing I did with my bow and so fresh in my mind. I’ve just finished experimenting with different grips styles and finding (in fact, making) one to my liking. Documented here is my entire journey and experience. If you just want to read about modifying a grip then skip to about halfway down.
Grips are very individual to each archer, after all all our hands are different, and its amazing how different even each company’s base models are (walk along the shooting line next club session or competition). Take a look at the images below to see what I mean.

A variety of different recurve grips.
It could be that you pick up a bow and the grip fits in your hand perfectly, or it could be that your form would be much improved and you more comfortable with something different. Indeed, when I bought my current riser one of the things that made me fall in love with it was that I picked it up, and knew immediately where my hand should be every shot! Fast forward four years, a number of coaching sessions and form changes, and the same grip was causing me front shoulder problems and I really didn’t get on with it. So how do you know what’s best for you?
Well, like all things in archery equipment, the answer is to try things. If you’re sponsored or professional this is relatively straightforward, but for the vast majority of us, despite being a relatively cheap item (in archery terms) the costs would soon add up, so the best answer is to make some friends. I asked members at my club if I could try drawing (and shooting if they would allow) their bows to get a feel for different things. I was also fortunate to have some people lend me a few old or spare grips that they had so I could try them on my bow. If you do this and find something that works then great, you can order one online, fit it to your bow, stop reading this and go shoot. However if you don’t find that ‘perfect fit’ or the grip you like doesn’t fit on your bow (because being able to fit nice grips from a large supplier on one side of the planet on to the bows of a major supplier from the other side of the planet would is simply an unbearable thought, and would make our lives far too simple right…?) you may need to do something else.
Nice photo to break up the text.
Now, you may well have noticed that a number of archers have some kind of modification to their grips, and if you’re still questing for that Goldilocks fit, perhaps you should try modifying/building your own. That’s not to say you should fire up the CAD software or get down to milling machine in the workshop, rather take an existing grip, and change the shape of the bits you’re not so happy with until you get what you want.
So where to start? Looking back at the grips you tried, what did you like about them that you’d like to replicate, and what was not so good. Here are some things you should probably be should you be paying attention to:
High, Low, or Medium – These terms describe the angle at which your hand sits on the grip. Exaggerated examples to illustrate these are shown below (please don’t pay attention to this in terms of technique!). The way in which different grips promote different angles can be seen by looking at the grips at the start of this article. The effect of this comes in with where the pressure point is for you on the grip, and how your front arm aligns. My advice would be to try shooting different styles for a while (a week) if you can, as they all feel different. Width – We all have different hands, some people prefer a large contact area, whilst others like a small strip. Material – Do you like the warm, solid feel of wood? Something slightly softer and grippier? Shape – I like to be able to feel a sharp edge on the left (for a RH archer) side of the grip. This allows me to know when I have not got the pressure right and am sliding left. Others who have picked up my bow hate it however (though some also love it!). Make a note of these different attributes and build an idea of what your ‘perfect’ grip would be like.

Different styles of grip.
Once you have an idea what you’re after its time for the fun part! Now, as someone with excessive paranoia who is convinced they’re always going to mess things up, there was no way I was going to take my only grip and start messing around with it! Instead I brought a cheap plastic one that fit on my riser (Hoyt Ergo on to a HPX. £12 from your favourite archery shop at time of writing) to mess around with.
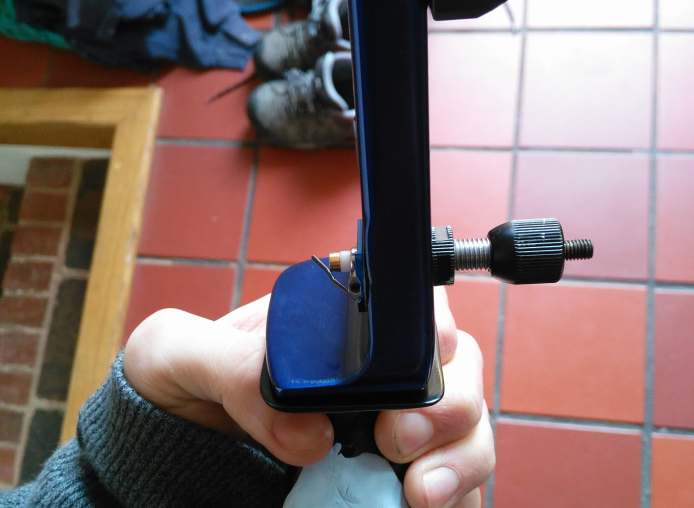
Stock ergo grip on a HPX riser.
This fit on my riser , but was by no means a perfect fit (see left image) so the first thing I did was mark out the edge of the metal on the plastic and belt-sand away until the edge profiles matched to my picky and obsessive levels of perfection. I then cleaned it up to a smooth finish with fine glass paper and wet-and-dry. Once happy with the aesthetics I proceeded to the important bit…
Now, before diving in with the modelling there are a couple of other items you need:
Some kind of modelling putty. I was recommended ‘Session Saver’; a 2 part epoxy designed for repairing surfboards. I found that it had an ideal cure time, was easy to work with, and set nice and hard. There are various options out there, and different people have different things they recommend, but this worked great for me. Masking tape and newspaper Blu-tack or plasticine A craft knife I would also highly recommend watching the following video by Jake Kaminski. This is broadly what I followed, and though long contains a lot of interesting and useful information:
As mentioned above, there was no way that my excessive paranoia was going to let me dive in with the epoxy – I’d mess it up for sure! Especially when you’re limited to only 15 minutes of curing time and material removal is difficult. Instead I used blu-tack (or plasticine) to practise fitting and moulding a shape that felt good and to know what was a good amount to use. Images of this are shown below.
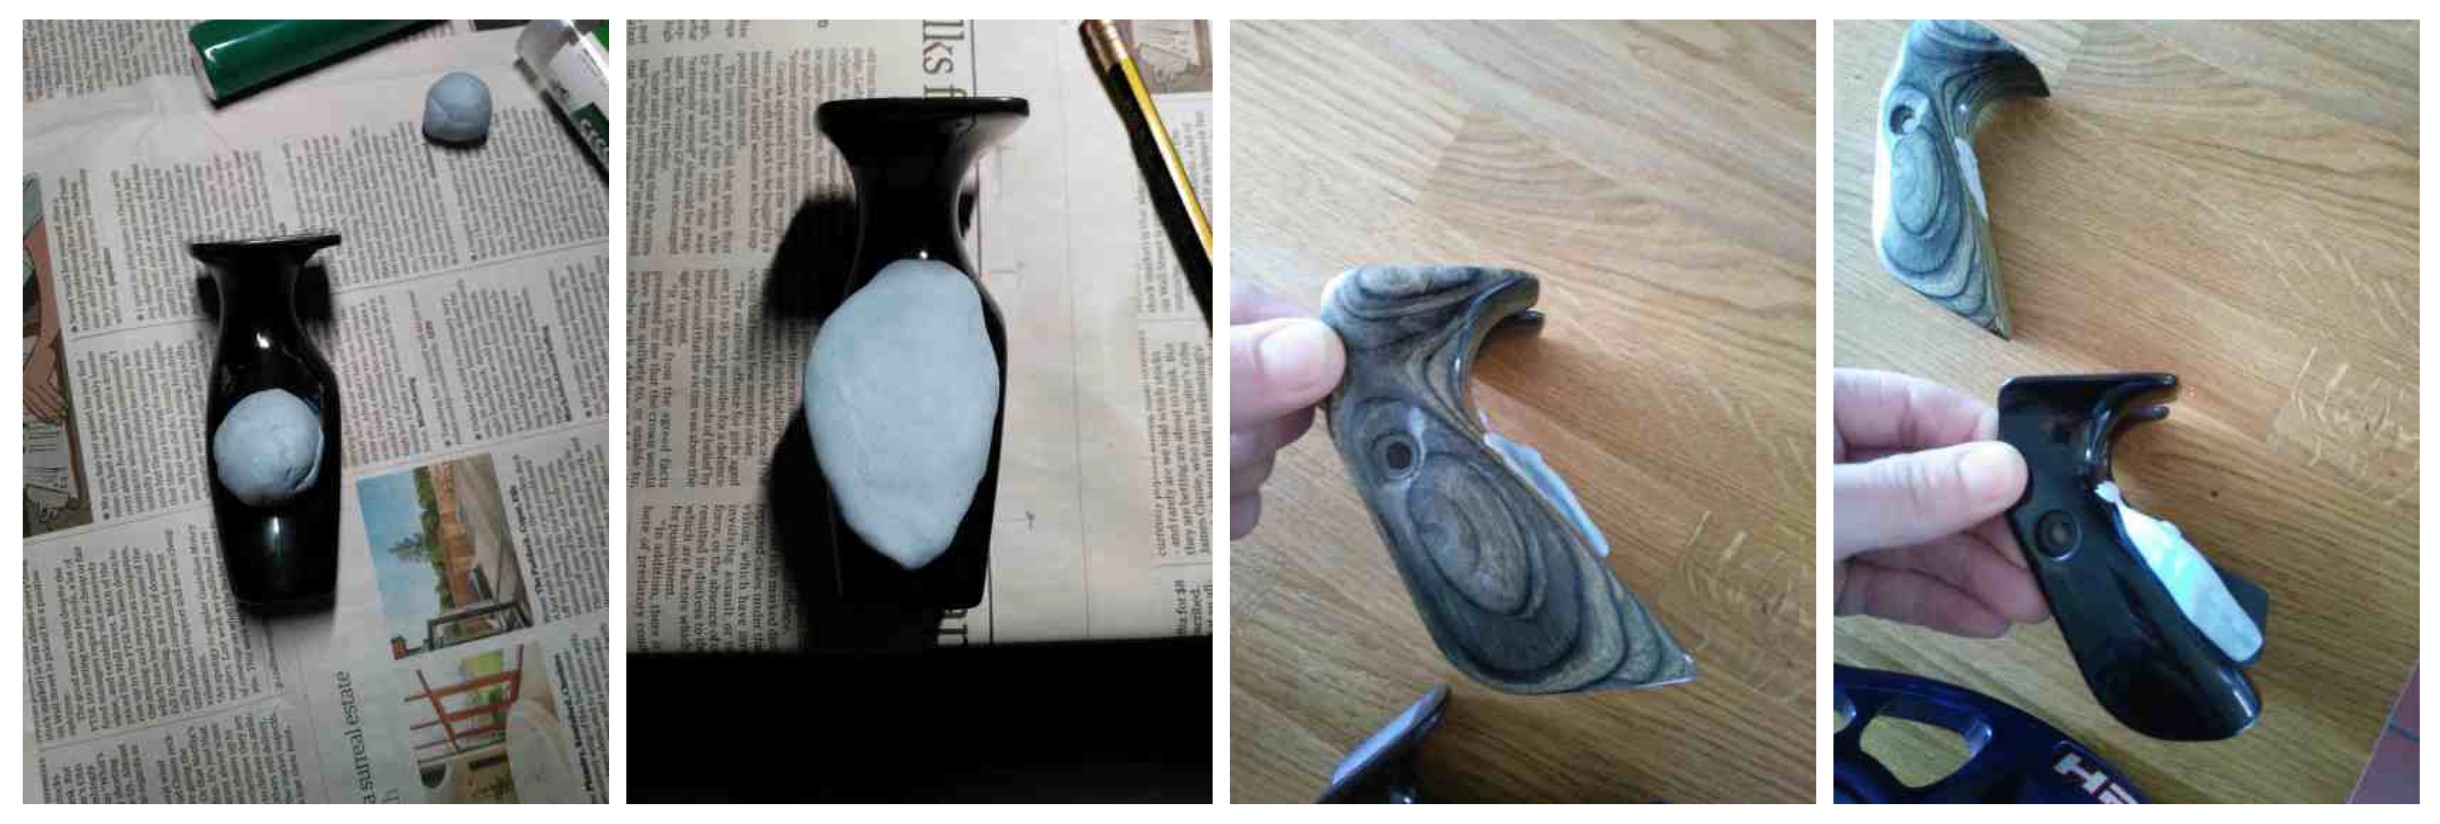
Forming and moulding the grip.
I started out by taking a spherical blob of material and placing it in the centre of the grip where I would be moulding it (image 1 above). How much to use depends on how much you need to modify the grip – experiment with different amounts until you get it right. I then applied pressure at the centre of this blob to make it stick to the grip, and start to flatten. Once secure you can begin to press it with your thumbs in to the desired grip shape. I found that the best way to do this was gently, and by pushing away from the centre where you placed the material. To get a smooth finish at the edges you have to apply a lot more pressure to stretch the material out until it gradually blends almost seamlessly with the original grip. The final result is shown in image 2 above, and from the sides in images 3 and 4.
The shape I was going for was a medium to high grip (building up lower down) with slightly more slope from left to right than the factory grip. One aspect I did want to keep however was the noticeable edge on the left hand side. This helps me know when my hand and pressure is in the right area, as you can really feel it if you’re pushing to far to the left!
You can at this point check how the shape feels by placing the grip on your bow. Depending on how hard your plasticine is you may even be able to try a shot with it.
Once I felt sufficiently practised and knew what I wanted and how to make it it was time to do it for real! I was holding the grip whilst it was attached to the bow (to check how it felt and get the edges right) so the first thing I did was to tape up the riser with masking tape. I didn’t want any putty residue or fingerprints tarnishing my beautiful riser!
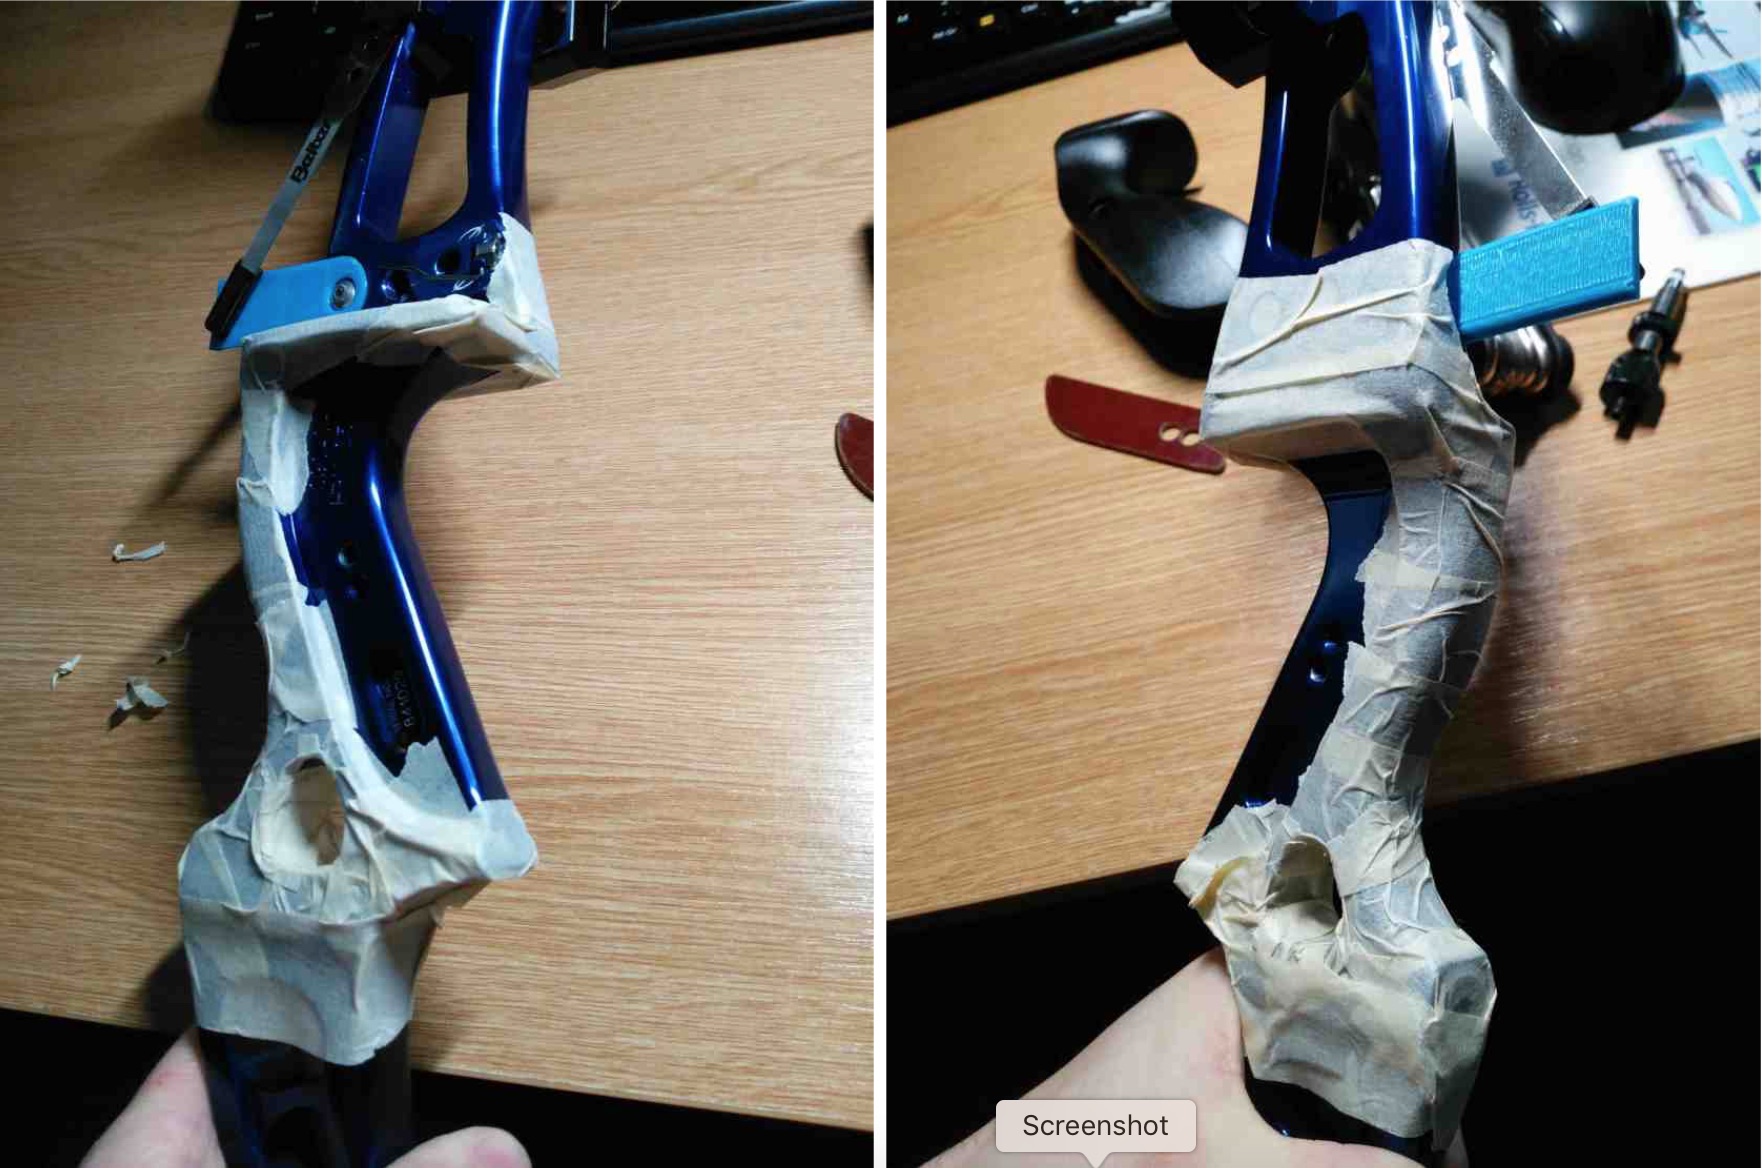
Safely taped up riser.
Following this I cut an appropriate amount of epoxy and kneaded it for about a minute until it turned one uniform colour. The epoxy is provided in two separate parts which undergo a chemical reaction and harden when mixed. You can feel the reaction begin happening as the mixed putty heats up.
Once sufficiently mixed, I simply repeated the process described above making a sphere, pressing it on to the grip, holding to the desired shape, and smoothing the edges. I found it very hard and messy to remove material, so err on the conservative side – you can always add more later. You also have a time limit before the epoxy goes off (around 15 minutes). you can tell when this is happening because the epoxy begins to go tacky and becomes harder to shape. You should be done before this (especially if you practised!) but if it gets to this stage it is best to let it set and change later. Once complete leave it alone (don’t fiddle!) and leave it for the required cure time (around 24 hours). Take the tape off your riser, clear up, and once set it is ready to shoot!
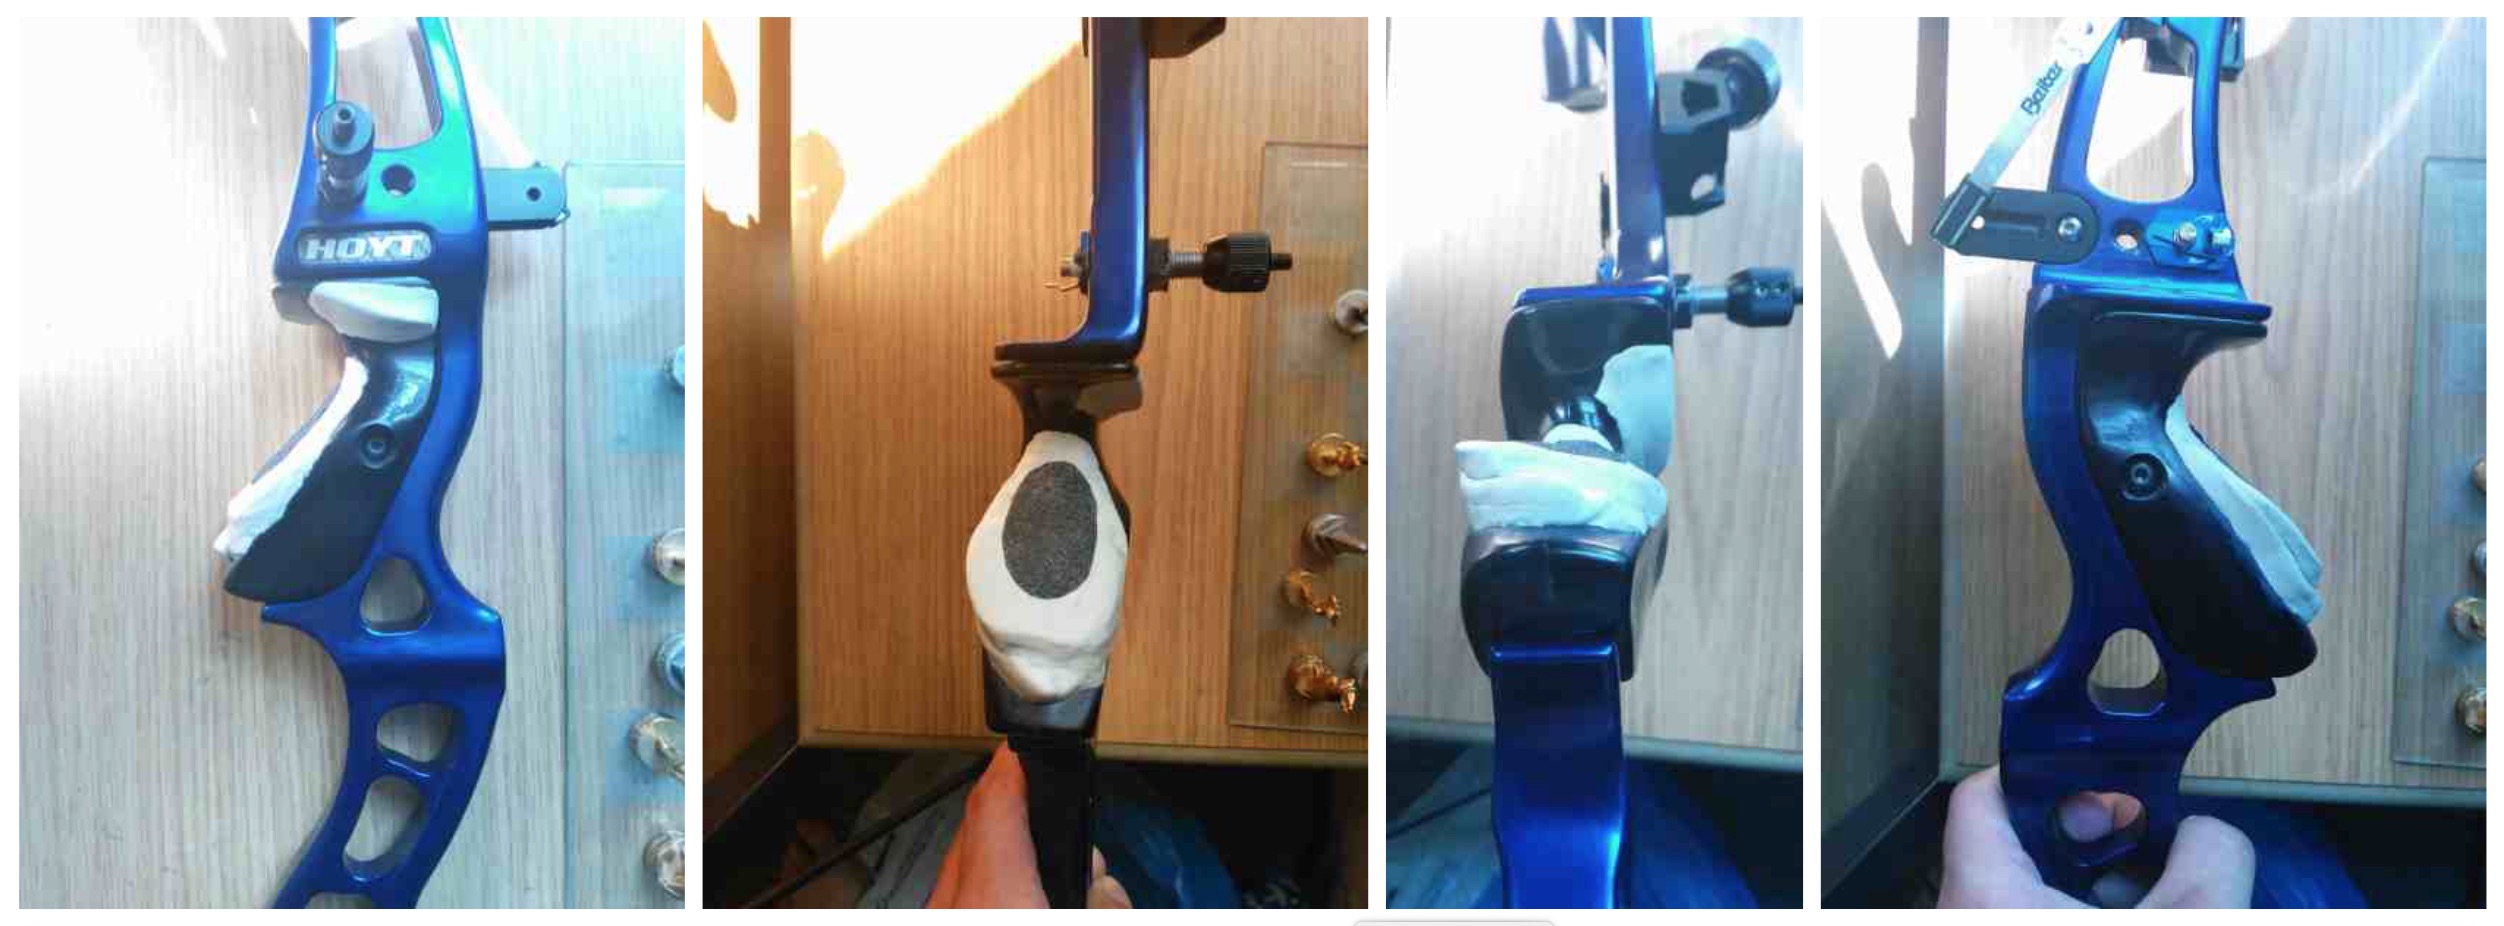
The end result.
After shooting your grip a but you may find you want to make some changes or apply some finishing touches. I found that my first attempt wasn’t quite high enough, so I repeated the process about a week later with a little more material – the epoxy sticks to itself. I also found that with the new hand position my thumb was left floating inconsistently, so I also built up the the top right hand side. This can be seen in the images of my final grip above. Once I was happy with the shape I decided to add a little bit of skateboard deck tape to the centre. This stops your hand slipping on hot days, and can also be used as a reference for pressure point. This is of course optional, I know some people like to wrap grips with racket tape, others like them plain, others perhaps something else entirely.
I hope this post perhaps comes in useful to someone. If so I’d love it if you could leave me a comment to say so and how your grip building experience was. If there is anything you think I could add, or any questions you have please let me know. Good luck!